Supermarine Spitfire MkIX – Museum Build


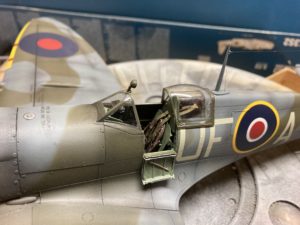
Really looking forward to this build – it’s a great story to tell of Flying Officer Arnold Hallas. He came from Burton and was sadly killed when he was flying Spitfire IX NH231 coded UF-A with 601 Sqn on the 30th April 1945.
His is believed to be the last Spitfire lost in the European Theatre, and I jumped at the chance to help the Spitfire & Hurricane Memorial Museum down at Manston in Kent with their display to show Arnold’s Spitfire as it was before his last flight.
I’m also excited because I love Tamiya kits and I’ve heard great things about this particular one. There are some really well thought out features and I really want to see how they come out.
1/32 scale is a great scale as well. It allows more detail than a 1/48, but without feeling over-sized like a 1/24 kit can.
The kit
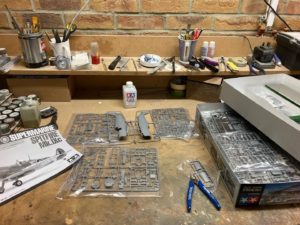
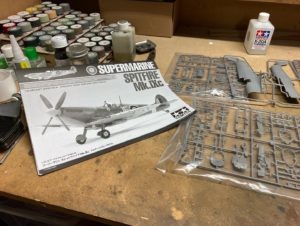
As always, I start by just getting the parts out and looking them over. This is really impressive with beautifully crisp detail – and so many parts!
The instruction book is a work of art in itself – brilliantly laid out (I’m a Graphic Designer by trade so I notice these things) and absolutely clear.
Stage 1: Cockpit and Engine
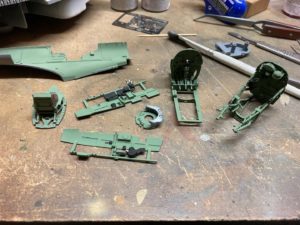
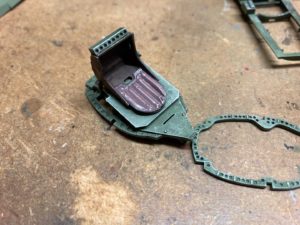
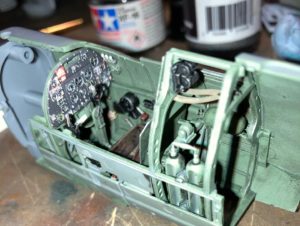
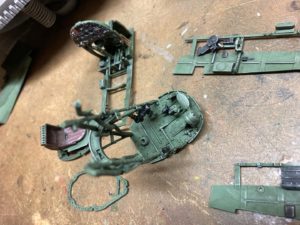
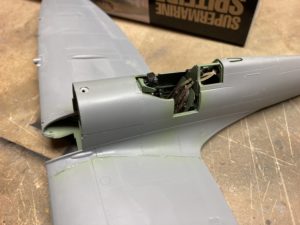
Before I get too phased by the number of parts, I decide to get started. The front part of the cockpit goes together quickly – and the level of detail is amazing compared with 1/48 scale ones I’ve built. You really get a sense of the structure sitting within the plane – rather than just a block with seats and elements glued to it.
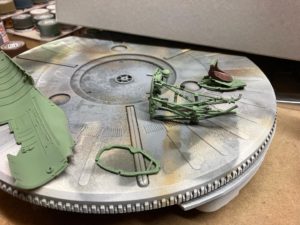
Once the elements are together I give them a spray of primer. This gives a solid base for the colour and washes.
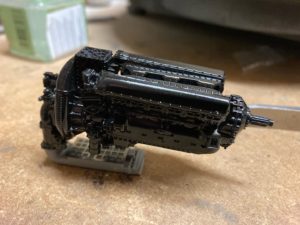
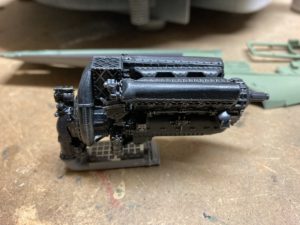
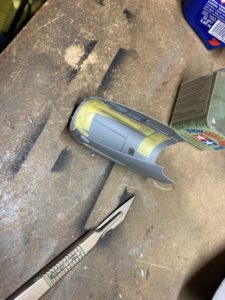
While those dry I can’t resist starting on the engine. Again this is nicely detailed and includes both bolted elements and magnets that will allow the engine covers to be removed so all this detail can be seen. It’s always a dilemma with a model whether to build it with engines etc showing, or looking like it’s ready for flight.
I normally go for the latter – but often that means leaving out engines or covering them over. Worse still, like all modellers I occasionally spend hours detailing parts that then completely disappear from view – but with this kit that shouldn’t be a problem.
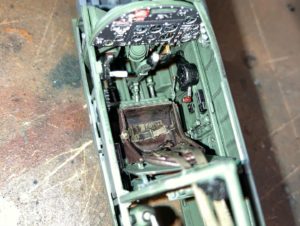
I paint the cockpit parts with the classic green and then apply a few areas of colour like red buttons and some bare metal elements. The engine is sprayed gloss black and allowed to dry ready for washes and highlights.
For the cockpit I lay down an oil wash to break up the solid green and add some shadows and grime to the parts and make it feel more realistic. Once this is dry I then use a dry brush of silver to add some highlights to the cockpit and create the impression of worn paint and revealed metal.
For the engine I’m starting with a jet black gloss – so there’s no point applying a wash. I start by dry brushing a dark grey on exposed surfaces. This creates a few mid-tones for the whole engine, and also takes the edge off the gloss black to leave a matt finish.
I then dry brush the silver again to give more of a metallic feel and bring out some of the detail. I’m hoping that the remaining gloss black where it shows will feel like oily metal – but we’ll have to see!
Stage 2: Main Build
For the cockpit I bought some 3D decals which I’ve never used before. They give a nice level of detail with very realistic and detailed dials and the padded seat cushion. These were what attracted me to the kit – but in the end I used the kits own seatbelts and I kind of feel I could have done the same thing with the kit elements just as well. Personally I won’t be buying them again unless they are for a kit with very poor detail.
They apply like water-slide transfers (decals) – so you just soak them in water and apply them to the model. This worked well with the dials etc, and is easier that PPE – but I felt a bit like a cheat putting down finished elements in one process!
Like all cockpits, as soon as you fit it into the fuselage you have the disappointment that all that detail just gets covered up – but I’m planning to have this cockpit open, so it will still be worth it.
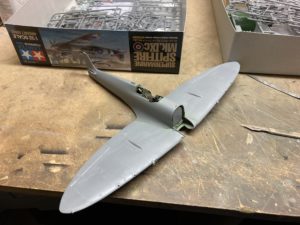
With the cockpit in the fuselage, it’s time to start putting the airframe together – and again the fit from Tamiya is spectacular. They just seem to think everything out so well – you feel that the build was designed by a modeller. It’s not just about supplying the elements and leaving you to it – they have really thought about how it goes together.
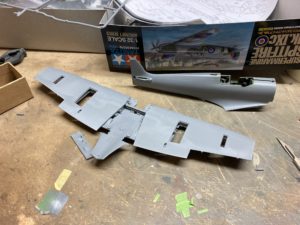
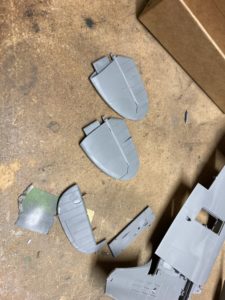
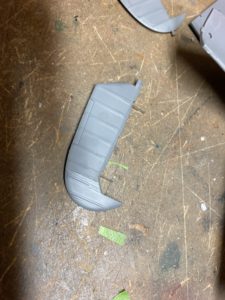
The fuselage halves and wings go together effortlessly with just a waft of sanding to smooth the joints. The ailerons and rudder are a bit fiddly – with metal pins and brackets to create hinges. It means that when the parts are together they can be moved – and they work well, but I can’t help but be reminded of old Airfix kits with floppy ailerons that I always ended up gluing into position.
One really nice touch though is the way the rear flaps are linked so the left and right move together – very neat!
The kit also comes with various elements that are removable – like the engine cowls and propeller and a droptank that also allows the kit to be put on a stand. These elements are held in place either with magnets or with pegs and rubber sockets (not sure that’s the right description – but if you’ve built a Tamiya tank you will know what I mean).
Stage 3: Painting
The kit comes with masks for the canopy, and these fit well – but they leave the cockpit open so I had to wangle a cover with some paper and tissues.
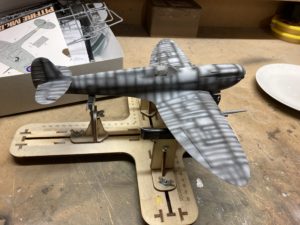
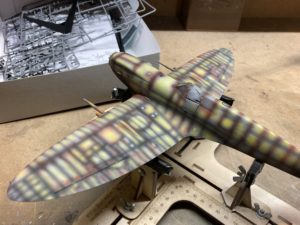
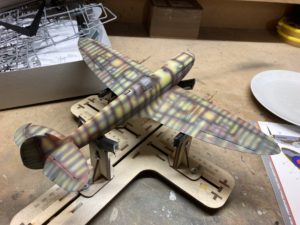
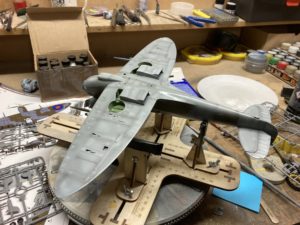
A quick coat of plastic primer (I use a rattle-can) and I could get started with some pre-shading. This helps give some variance and depth to the top coat. I started with some black along panel lines, and then followed up with some red over the top of that. I then airbrushed some white in the centre of the panels and then laid a bit of yellow over the top of that. The final result looks a bit like what Americans would call ‘plaid’ – but it should give some variance.
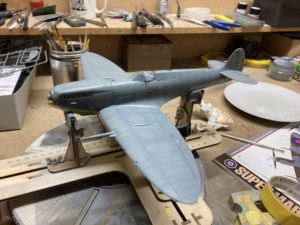
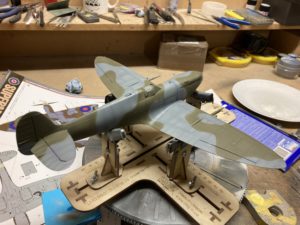
Next I lay down the underside colour and the grey on the upper surfaces. Both of these go all over the model, so a lot of the ‘plaid’ disappears – but you can see it shows through enough to make a difference.
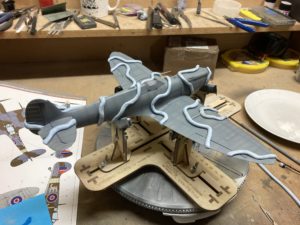
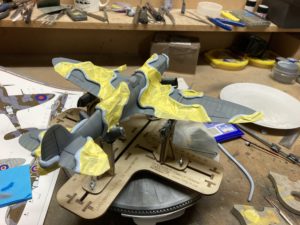
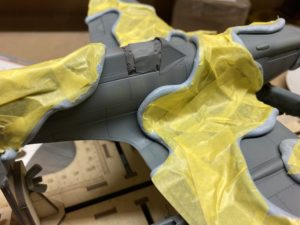
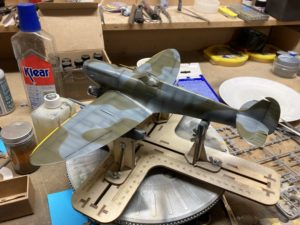
With the base colours down, it’s out with the Blue-Tac. I rolled these into long sausages and then use them to mark out the edges of the camouflage pattern. I then fill the grey areas with masking tape and I’m ready to start painting the green.
The advantage with the Blue Tack is that it gives a soft, feathered edge – rather than a hard edge with just tape. I can’t vouch for the accuracy of this – in my head this reproduces the edge they would have got if they spray painted the camouflage in the field by hand. I honestly don’t have a clue if that is what they did – I imagine a lot would have been brush painted and have a hard line between colours – but the soft edge looks great and I love it. So there!
Step 4 – Post shading
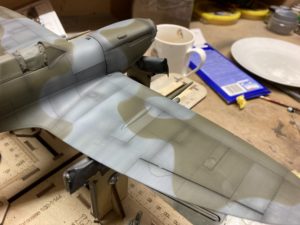
Unfortunately, by the time I’ve laid the green over the top of the grey, a lot of the pre-shading (plaid) just disappears. That tends to leave the paint on the model feeling a bit too flat, so I use Post-It notes to block off panels and waft a bit of white over them. This breaks up the finish nicely, and I also do it freehand along leading edges.
Finally I use a bit of black in key areas to break it up more, and then finish off with the yellow strips along the leading edge of the wing and give the whole model a coat of gloss.
I use Johnson and Johnson Klear for this – it’s a floor polish that was recommended to me years ago. I have had this bottle for the last decade or so and it’s nearly empty – and they replaced this formula with a new one – for health and safety reasons I assume. Apparently the new stuff works as well – but fortunately I managed to buy a bottle (for a ridiculous price) on eBay – so I’m hopefully set for the next decade!
The gloss won’t be the final finish – but it gives a better base for the transfers (decals) to fix to. Modern renovated aircraft are often gloss because it is harder wearing, but as far as I’m aware all aircraft were painted in matt colours during the war – so I will finish the model with a matt varnish.
Step 5 – Transfers (or Decals if you are under 50 and/or not British)
As always, Tamiya transfers are clean and precise, with a good thickness that means they don’t tear, distort or fold. I lay them down with a bit of water and let them dry and fix to the model. I then use MicroSol softening solution to help them lay flat over the panel detail etc.
First time you use this it’s quite scary – because the whole transfer wrinkles and looks like it’s not going to lay flat. The trick is you have to leave it alone and let it dry off – it will flatten out and when it does it conforms nicely to the detail.
I usually do this four or five times to get them nicely flat – and if there are any air bubbles just give them a quick jab with a sharp scalpel blade to let the air out.
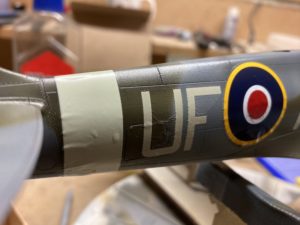
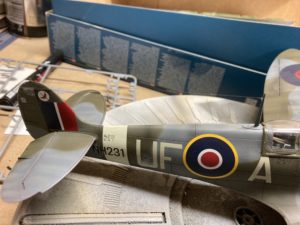
I bought a set of numbers to make up the specific UF A letters on the side of Arnold’s plane, and these go down well. I usually paint the stripe just ahead of the tail, but here I used the transfer supplied with the kit – which works perfectly. I also printed my own serial number for the aircraft using laser transfer sheet which works well where you need specific numbers.
They also supply transfers for the yellow wing edges and red over the gun ports – but I had already painted these before I realised.
I always wondered why RAF aircraft had red painted over the gun ports like this – and it was only recently when working on Beaufighter that I found out it was a waxed paper that was fixed over the top of the port with dope to prevent the guns from freezing – and from other contamination I guess. Obviously this would protect the guns in the wings until they were fired through the paper – clever!
Step 6 – Panel lines and finish
Once the transfers have laid flat, I give it another coat of Klear to seal them in, and then once that’s dry apply an oil wash along all the panel lines. To do this I thin the black oil colour to roughly the consistency of ink, and then use a brush to apply it carefully along the panel lines. If there are a lot in a small area I will just paint the whole thing to give a coat of oil.
Once it has more or less dried, I use a piece of kitchen roll just damp with turps to wipe away the excess – just leaving the black to define the panels nicely. The trick here is not to be too thorough – the excess that doesn’t get wiped away just gives the aircraft a more ‘flown-in’ feel and makes it look a little more weathered.
I also apply a little dab of oil colour behind some of the caps and covers, and then using a damp brush just wipe this wavy in the direction of the airflow. It’s a subtle effect but just adds a bit more depth.
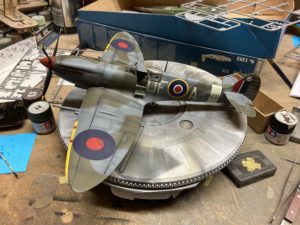
Once that has also dried, I apply a coat of matt varnish. This gives the aircraft that distinctive combat matt finish, but also blends the transfers in nicely to make them seem painted on.
It also means that I can now do my favourite part of the build – removing the masking from the canopy. I’ve always thought this brings the model to life – a bit like like a sleeping figure opening their eyes. There you go – who said modelling couldn’t be romantic!
Step 7 – Final touches
At this stage the model is virtually finished, just the wheels and a few final details to add. This kit comes with rubber tyres – which I confess I’m not a fan of. Although these are made of rubber or a synthetic equivalent. somehow for me they just don’t feel real. For this build I had bought some resin wheels that are weighted – so they have a slight flattening and bulge at the bottom – as if a weight is resting on a tyre. Sounds pedantic – but take a look at your car next time you get in and see just how much real tyres bulge when they have weight on them.
These are superglued onto the wheel struts. The struts in the kit come in two halves with a metal rod running up the centre to make it rigid. These then screw into the wing of the kit – so you can replace them with the folded away wheels if the mood takes you.
I also applied just a bit of chipping along the wing edge where the pilot would climb up. This was done using an ordinary pencil which marks the matt finish well and carries a slight sheen toi give the effect of bare metral showing through.
The final touches for me was then to add the aerial at the rear of the canopy, and the run a wire from the fuselage to the top of the aerial and then to the top of the tail. This is achieved with an elastic rigging cable, more superglue and the kind of bad language that would make Frankie Boyle blush.
Custom Build
Get a price for a model custom-built to your exact specification

